I’ve had plenty of WordPress sites on shared hosting (DreamHost) and it was wonderful as my experience with their custom service has always been terrific. Shared hosting was great to have during those early years as it’s relatively easy to manage, e-mail is included, and the costs are low.
However, the problem with shared hosting is that the servers aren’t generally optimized for WordPress performance and once you try to do anything that requires some memory. For example, a simple task like exporting a SQL database using a plugin or phpmyadmin can even become impossible.
Then I found Digital Ocean
As I wanted to try more complex things I started looking around for a new provider where I could consolidate all me websites into one platform. My goal was to move all my sites to one super fast provider with low costs. Now there are many VPS providers, like Vultr, Linode etc. I choose for Digital Ocean because it looks like a company that was “fast-moving”, cheap, developer-friendly and financially secure (big investments).
Get a Control Panel for your VPS
The big hurdle with cloud hosting for most people is that with Cloud hosting there are no control panels. However, back then I found Serverpilot and I used their services to manage my VPS at DigitalOcean. Two weeks ago, I migrated to Runcloud.io as they charge per account while Serverpilot charges per server. Paying per server was a costly option for me and my clients. I like to run my own apps and my clients on their own fast server. And Serverpilot’s monthly bill was costly, I felt a bit worried at first but Runcloud.io is running very smoothly and I love all the extra options I have. But that is a story for another blog post 🙂
To hopefully make it a bit easier, I’m sharing the steps I used to set up and migrate multiple sites to the same Droplet.
If you just need one site, it might be simpler to have DigitalOcean set up WordPress (under Applications) when you create the Droplet, and then skip to the migration steps.
DNS Settings
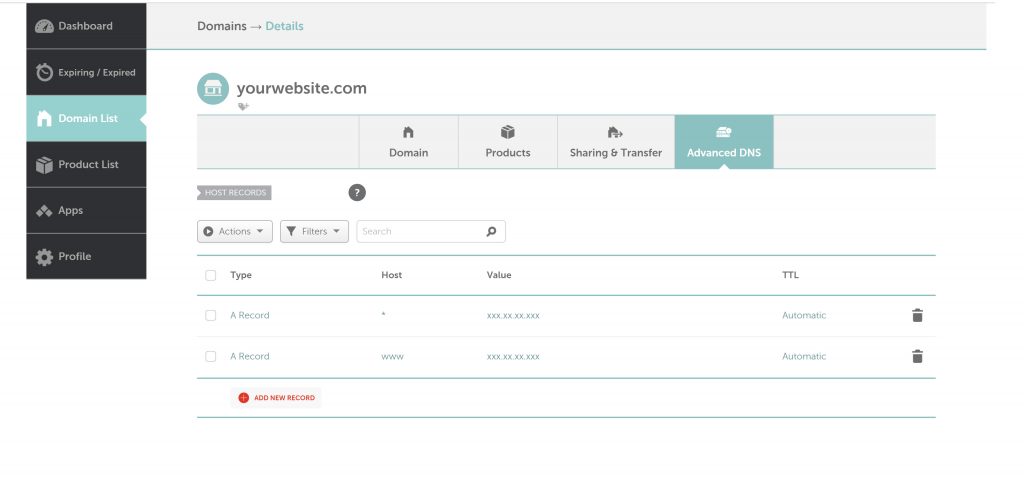
Make sure you setup your DNS settings correctly by pointing your domain registration to the right IP address. You can do this with your domain registrar, which are sites like: godaddy.com, namecheap.com, 1and1.com etc.
My A record looks like this:
Droplet Creation
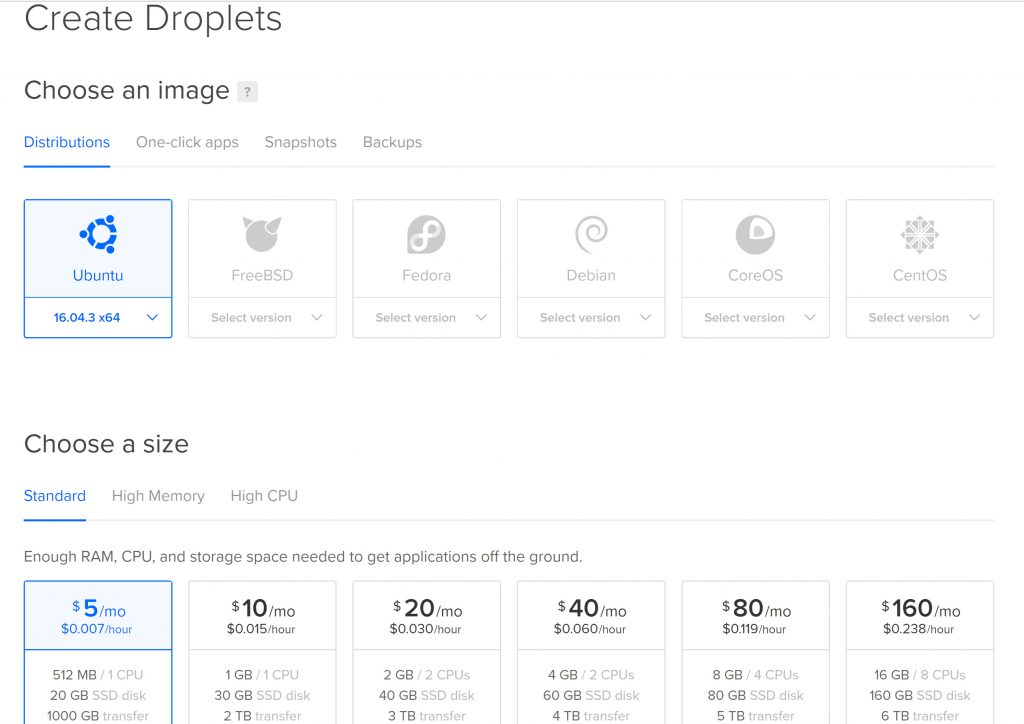
a) Create an account with DigitalOcean. Then head to the Create Droplets tab.
b) Click “SSH Keys” and add your public key. You can also get an FTP key as we won’t need SSH to manage our data. However, I do strongly recommend learning about SSH as it will make your workflow super fast!
Cheatsheet: To copy your public key, open terminal and enter:
pbcopy < ~/.ssh/id_rsa.pub
That should save it to the clipboard, which you can then paste in the field for DigitalOcean.
GitHub has a good instructions for generating an SSH key if you don’t have one.
c) Click “Create” to build a new Droplet.
Give the Droplet a name you’ll remember.
Choose a size (I went with the smallest to house my low traffic sites).
Choose location and server, I went with the defaults (New York, Ubuntu 14.04 x64 server).
Add your SSH key.
Click “Create Droplet”.
Your droplet will take few seconds to set up. When it finishes the IP address will be at the top of the dashboard. Go ahead and copy this. Throughout this tutorial I’ll refer to that IP address as xxx.xxx.xx.xxx.
Next step is to SSH into your new Droplet. You need to use the root user to do this. Open terminal:
ssh root@xxx.xxx.xx.xxx
(You shouldn’t need a password if your SSH key was added correctly)
To set up the WordPress site(s), I used, as mentioned above, Runcloud.io.
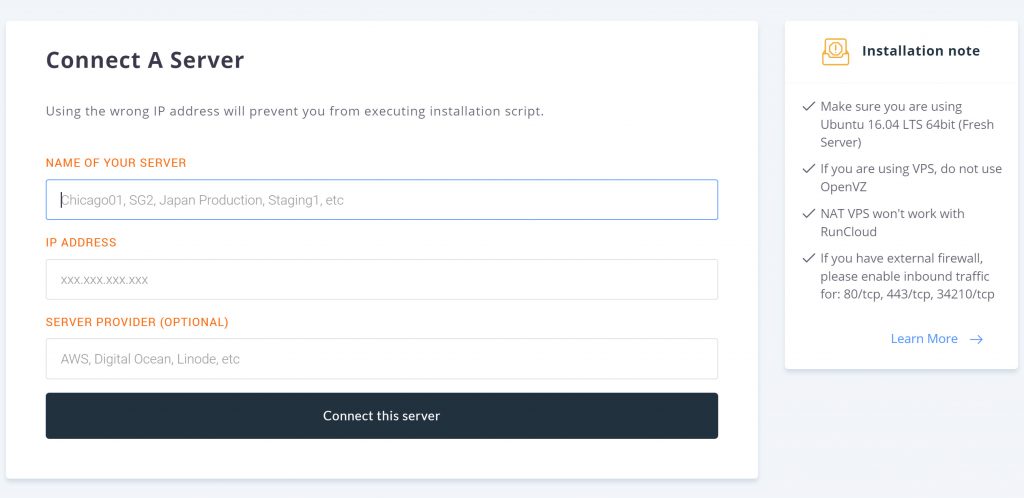
To install Runcloud server, create an account with them. Login to your server with SSH for one time and run this from your Droplet. After this step you don’t necessarily need to use SSH anymore:
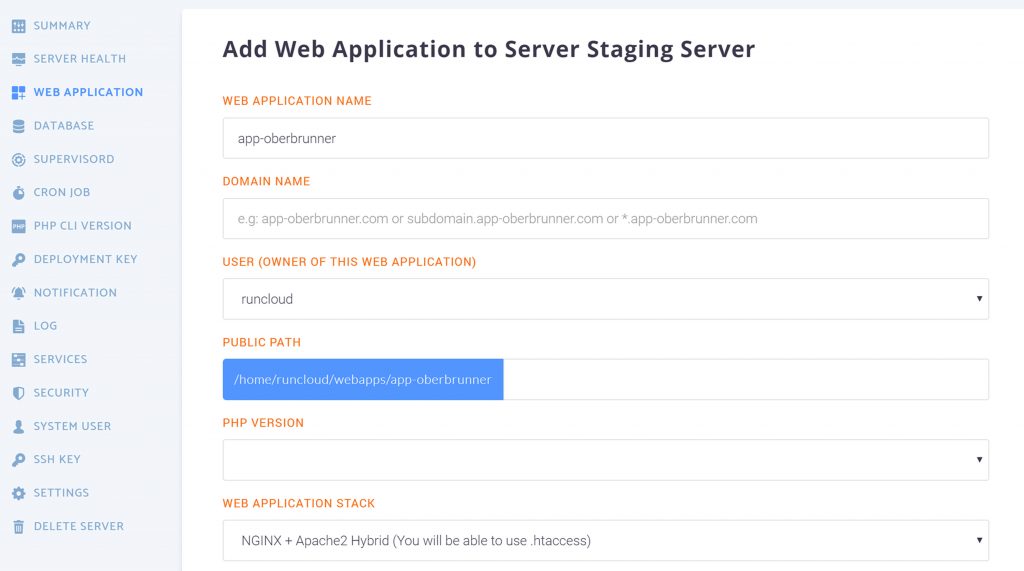
Once Runcloud is set up. Head in to the dashboard and create a web app.
After you have created your Web Application make sure you go to “system user” tab and change your “runcloud” user password to something you can use.
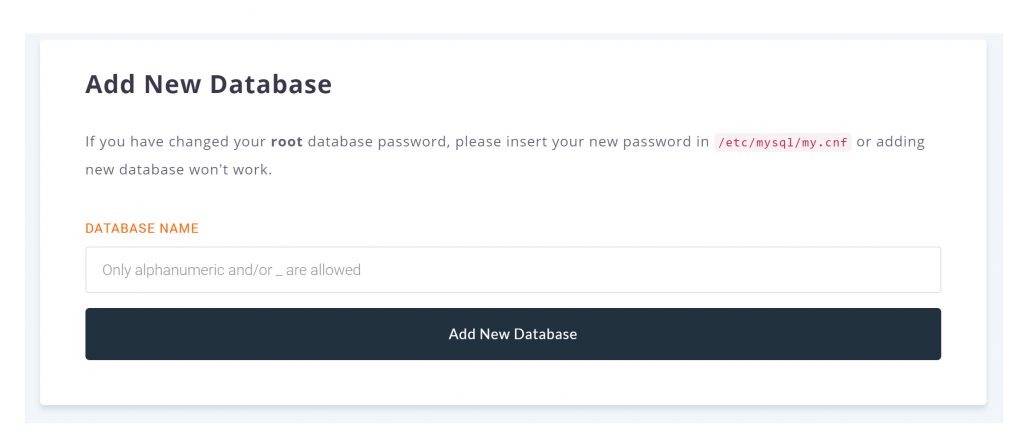
Then go ahead and create a new Database
You can create a database user in the same “Database” tab. Then link the Database User to the Database you have just created.
Make sure you save the database name, database user and database password! We need it later.
Install WordPress with Runcloud.io
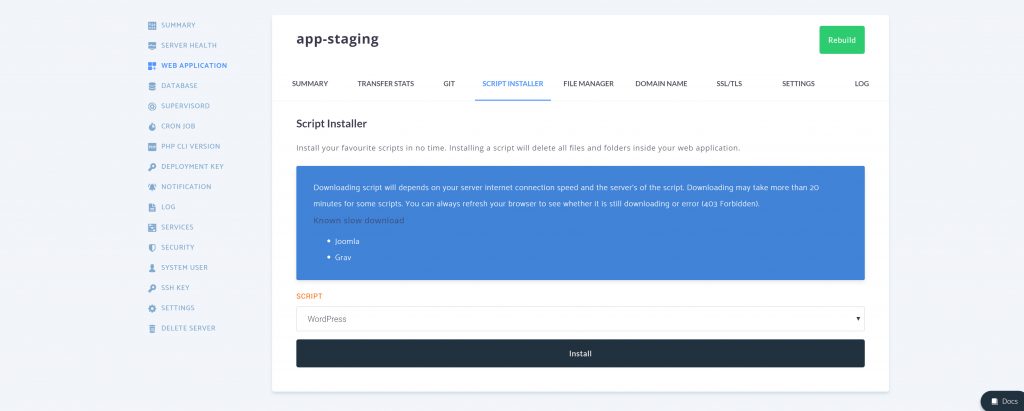
Go to your application and pick “script installer” then go ahead and run it.
Now our application is ready! Now move your old site.
There are many different approaches you could take to migrating a site. I’ve been using the manual method explained below because that’s just the way I got used to doing it. If you don’t want to use SSH then you can use either: Wp-Duplicator or Migrate-DB-Pro.
For the purposes of this tutorial, I am going to assume you have the “wp-content” directory for the site you wish to migrate and an export file of the mySQL database (“database.sql”) saved on your local desktop (though the steps aren’t too much different even if you are ssh’d into a different remote server).
Move your files and database
First we’ll want to compress or copy the “wp-content” directory:
With SSH we can do the following:
tar -czf wp-content.tar.gz wp-content/
Now, transfer that to the remote directory where the new WordPress install is:
scp wp-content.tar.gz root@xxx.xxx.xx.xxx:/home/runcloud/webapps/app-oderbrunner/
(Depending on the size of the file, this might take quite a while to transfer.)
Now, switch back to the remote shell and make sure you’re in the files directory for the site (/home/runcloud/webapps/app-oderbrunner). We’re going to remove the current “wp-content” directory, unzip the new one we uploaded, and then remove that zip file:
rm -rf wp-content
gunzip -c wp-content.tar.gz | tar xopf –
rm wp-content.tar.gz
Without SSH (and a looong wait)
Login to your FTP and copy the wp-content files to your computer.
Then upload the wp-content files to the new site at /home/runcloud/webapps/app-oderbrunner/
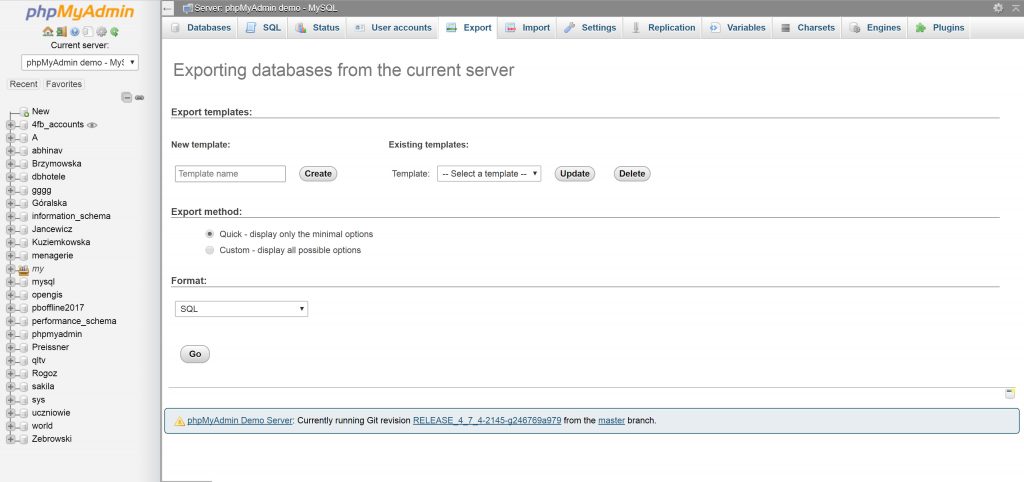
Next lets export the SQL database with Phpmyadmin
Go to Phpmyadmin website and download the files.
Upload Phpadmin to your old website: /htdocs/app-oldwebsite/Phpmyadmin-34tg3tgwg/
Edit Phpmyadmin file config.sample.inc.php
Add a long random text to blowfish_secret.
/**
 * This is needed for cookie based authentication to encrypt password in
 * cookie. Needs to be 32 chars long.
 */
$cfg['blowfish_secret'] = 'RANDOM TEXT GOES HERE FEWG#@TGWEV'; /* YOU MUST FILL IN THIS FOR COOKIE AUTH! */
Save as config.inc.php.
Visit yoursite.com/Phpmyadmin-34tg3tgwg/
Login with your database credentials.
Then export your database with Phpmyadmin. Super Easy!
Move SQL database
Install Phpmyadmin to /home/runcloud/webapps/app-oderbrunner/Phpmyadmin-34tg3tgwg/
Then use the option Import. Select your database and run! If the database is too big then you can zip it and upload it.
Install Search and Replace and change all your Urls
Last step is to replace the URLs in the database. Which is super easy.
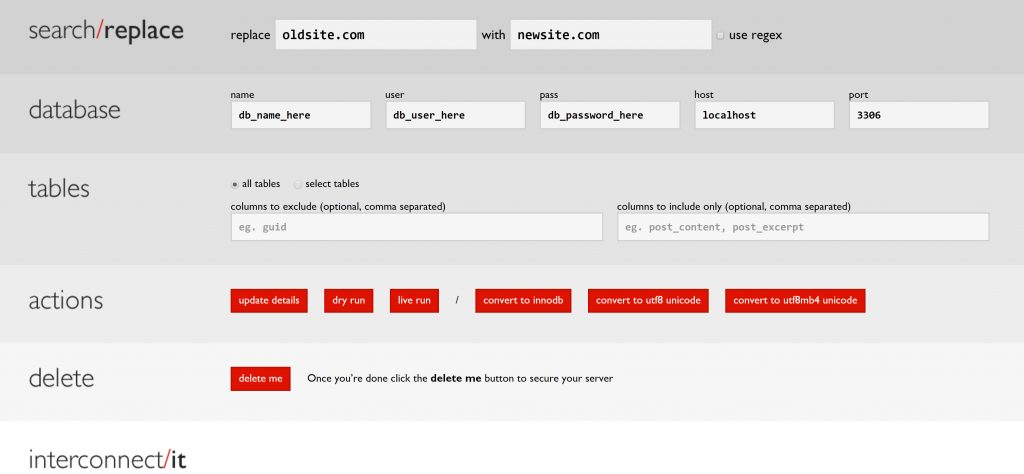
Go download Database Search and Replace Script in PHP.
Unzip the file and add all the files to a folder on your new site:
Visit yourwebsite.com/Search-Replace-DB-master/
Fill in your database credentials that we noted down earlier. If you forgot them than go back to your runcloud.io dashboard and trace them.
Run the script. Done!
Lastly edit your wp-config.php file in the main WordPress folder with your database credentials.
&lt;?php
define('DB_NAME', 'db_name_here');
define('DB_USER', 'db_user_here');
define('DB_PASSWORD', 'db_password_here');
define('DB_HOST', 'localhost');
define('DB_CHARSET', 'utf8');
define('DB_COLLATE', '');
Wrap Up
Hopefully this has been helpful. It was a lot of work but it’s worth it! Now you know how to everything manual and free (other than the VPS hosting by DO and VPS management panel from Runcloud) If you have any additional suggestions or tips, feel free to leave them in the comments.
Recent Comments